Welcome back my $0 to $5,000 Amazon selling journey. Last week I wrote about Amazon’s fees and how they affect your bottom line. This week we’re jumping straight to the nitty gritty -- the exact steps you need to take when creating your Amazon account.
Let’s get started.
Gather Your Documents
Before you create an Amazon selling account, you’ll want to have a few things handy. Amazon may not request every piece of documentation but every seller should have these on hand in case Amazon decides to verify or review an account. You’ll need:
-
A credit card. Every seller must have a valid credit card on file. This card is kept on file in case you have a negative account balance. Don’t put in a debit card or a prepaid gift card -- Amazon occasionally runs these cards to validate them and will freeze your account balance if they find a card that’s not in compliance with their terms of service.
-
A business license. Amazon wants to know you’re a real business -- not a scammer or fly by night operation. Complete registration in all applicable jurisdictions before creating an Amazon account.
-
Federal Tax Id or social security number. The federal government issues a nine-digit number to identify any business operating in the United States. You can get one for free at IRS.gov. You can also use your social security number to create Amazon account -- just be aware that without a business, you can be personally liable for any problems that arise. Talk to your accountant about which option is best.
-
Bank account number. Amazon can only make payments to a valid bank account -- they won’t send money to a prepaid card or through a third party service.
-
A utility bill. Amazon routinely reviews seller accounts and requests this piece of documentation with name and address visible. Again, they want to know you’re a valid business,
Now let’s create your account!
Please note, these screens could change at any time. If you don’t see exactly what is shown below, it means Amazon has made a few changes. The basic info you input should be very similar to these screenshots.
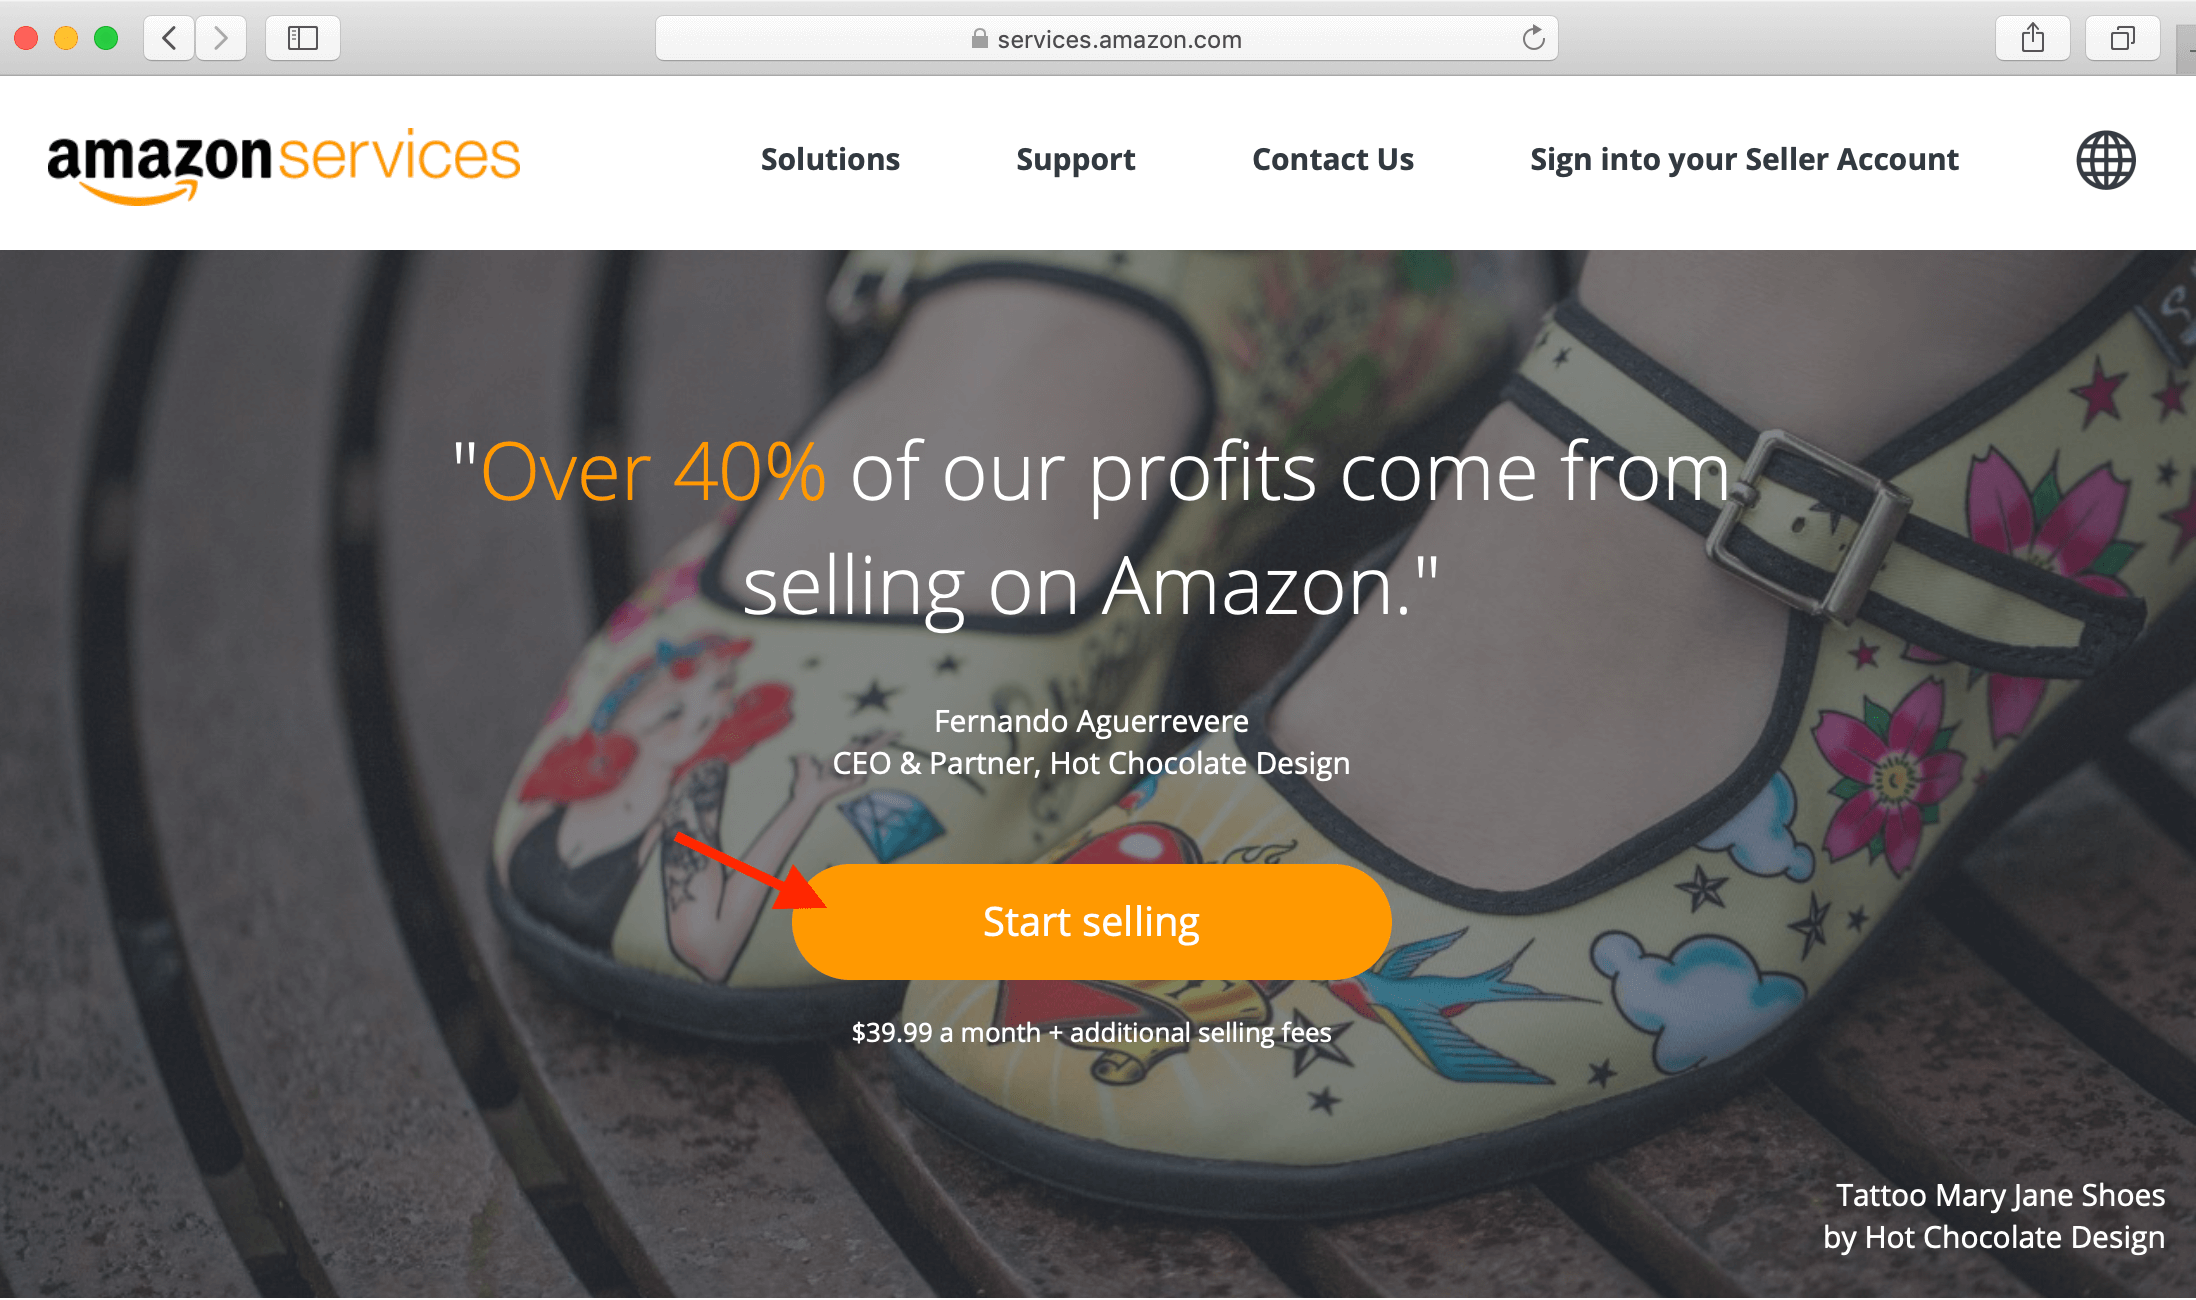
First, go to services.amazon.com and click “Start selling”. You’ll need to log in with your regular Amazon buyer account credentials.
Start Selling
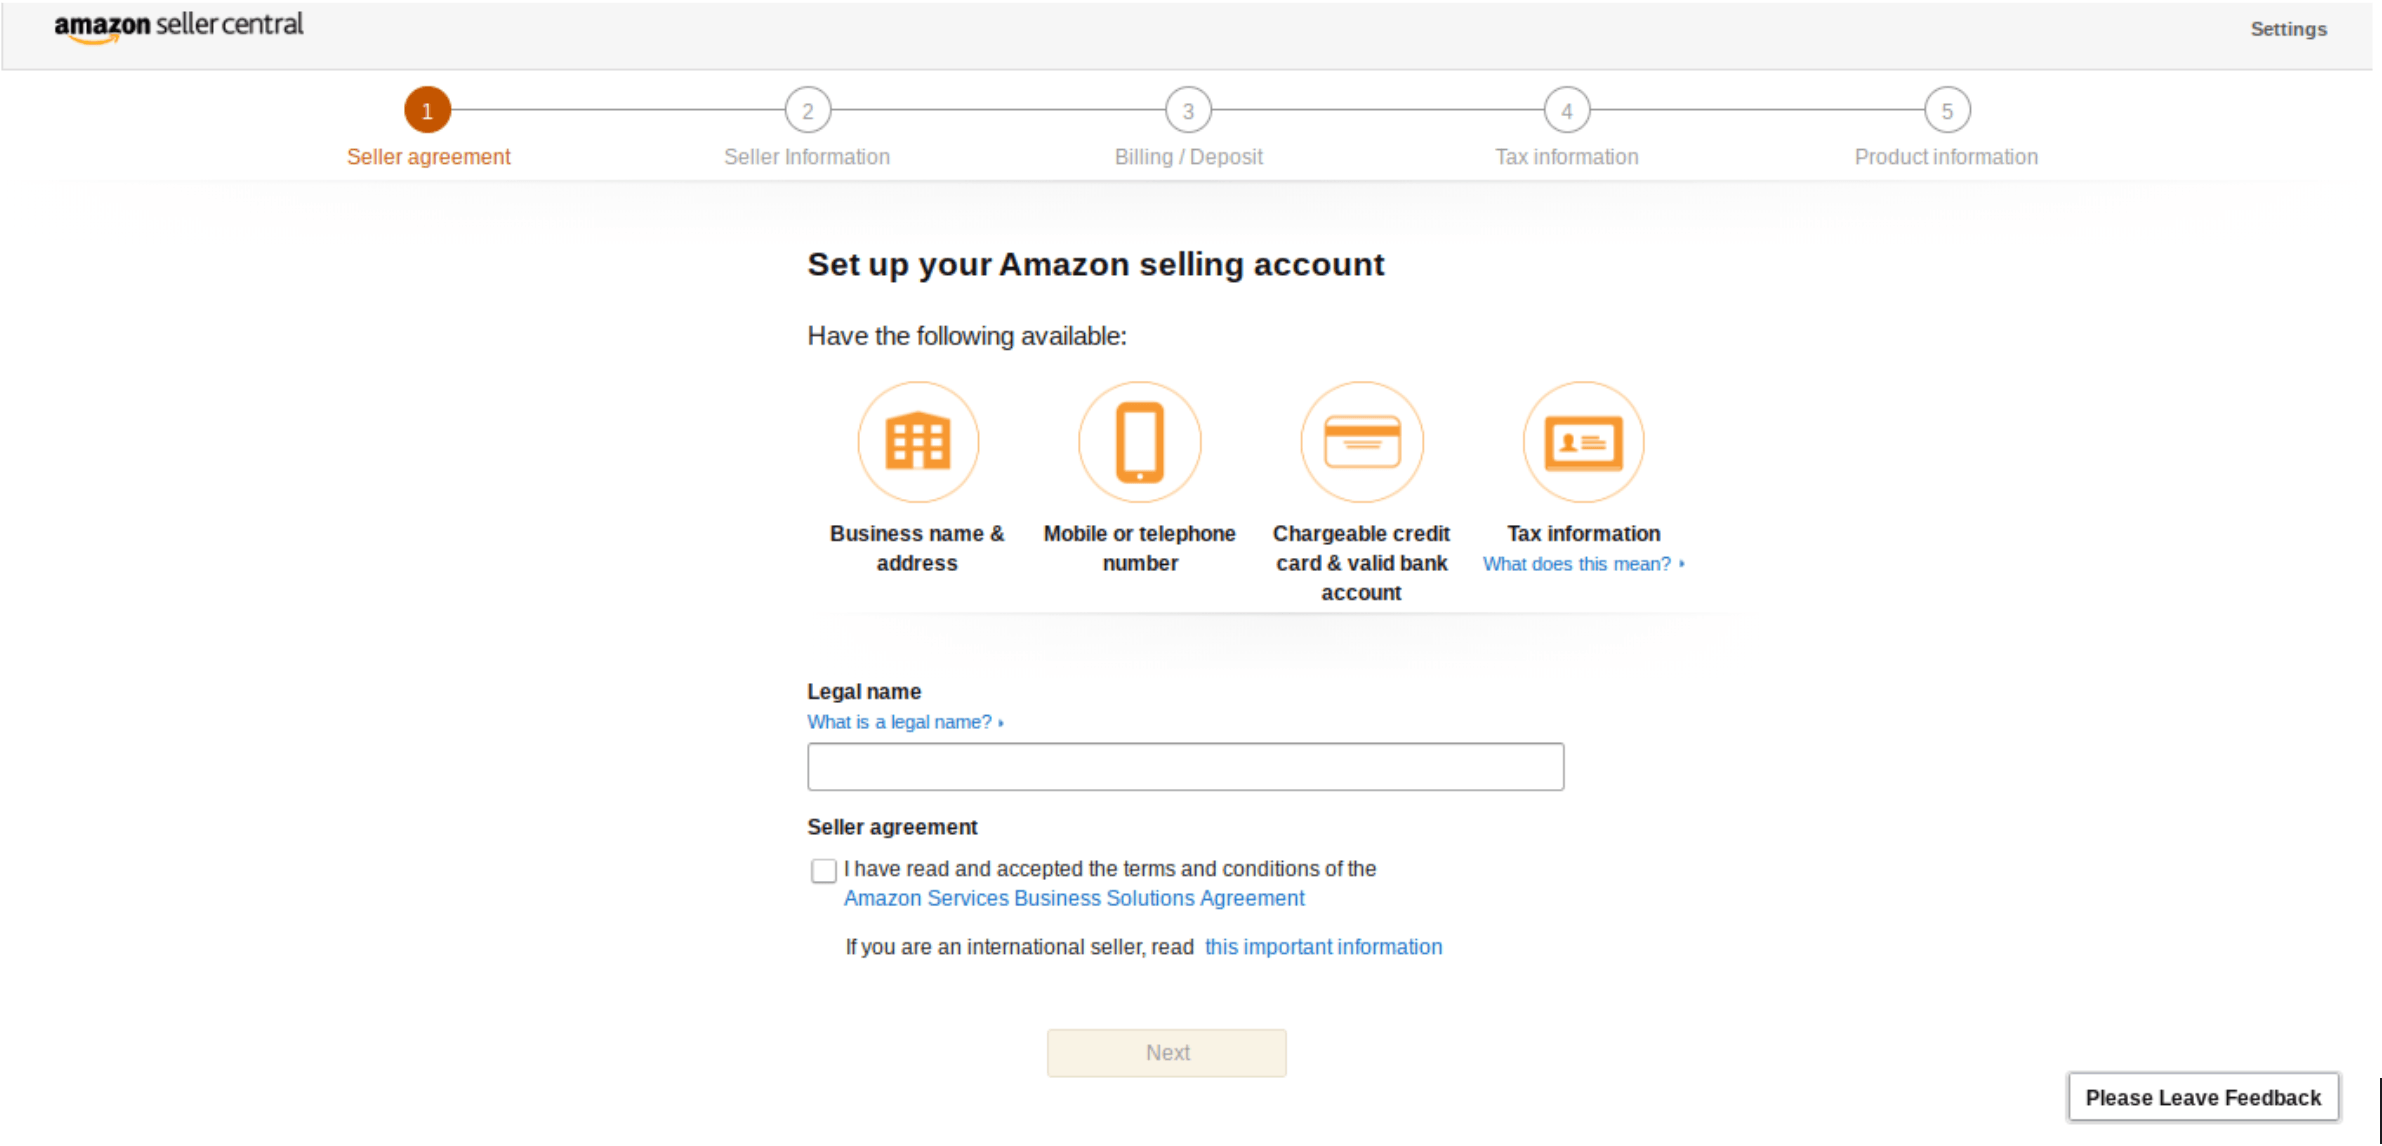
Step 1: Seller Agreement
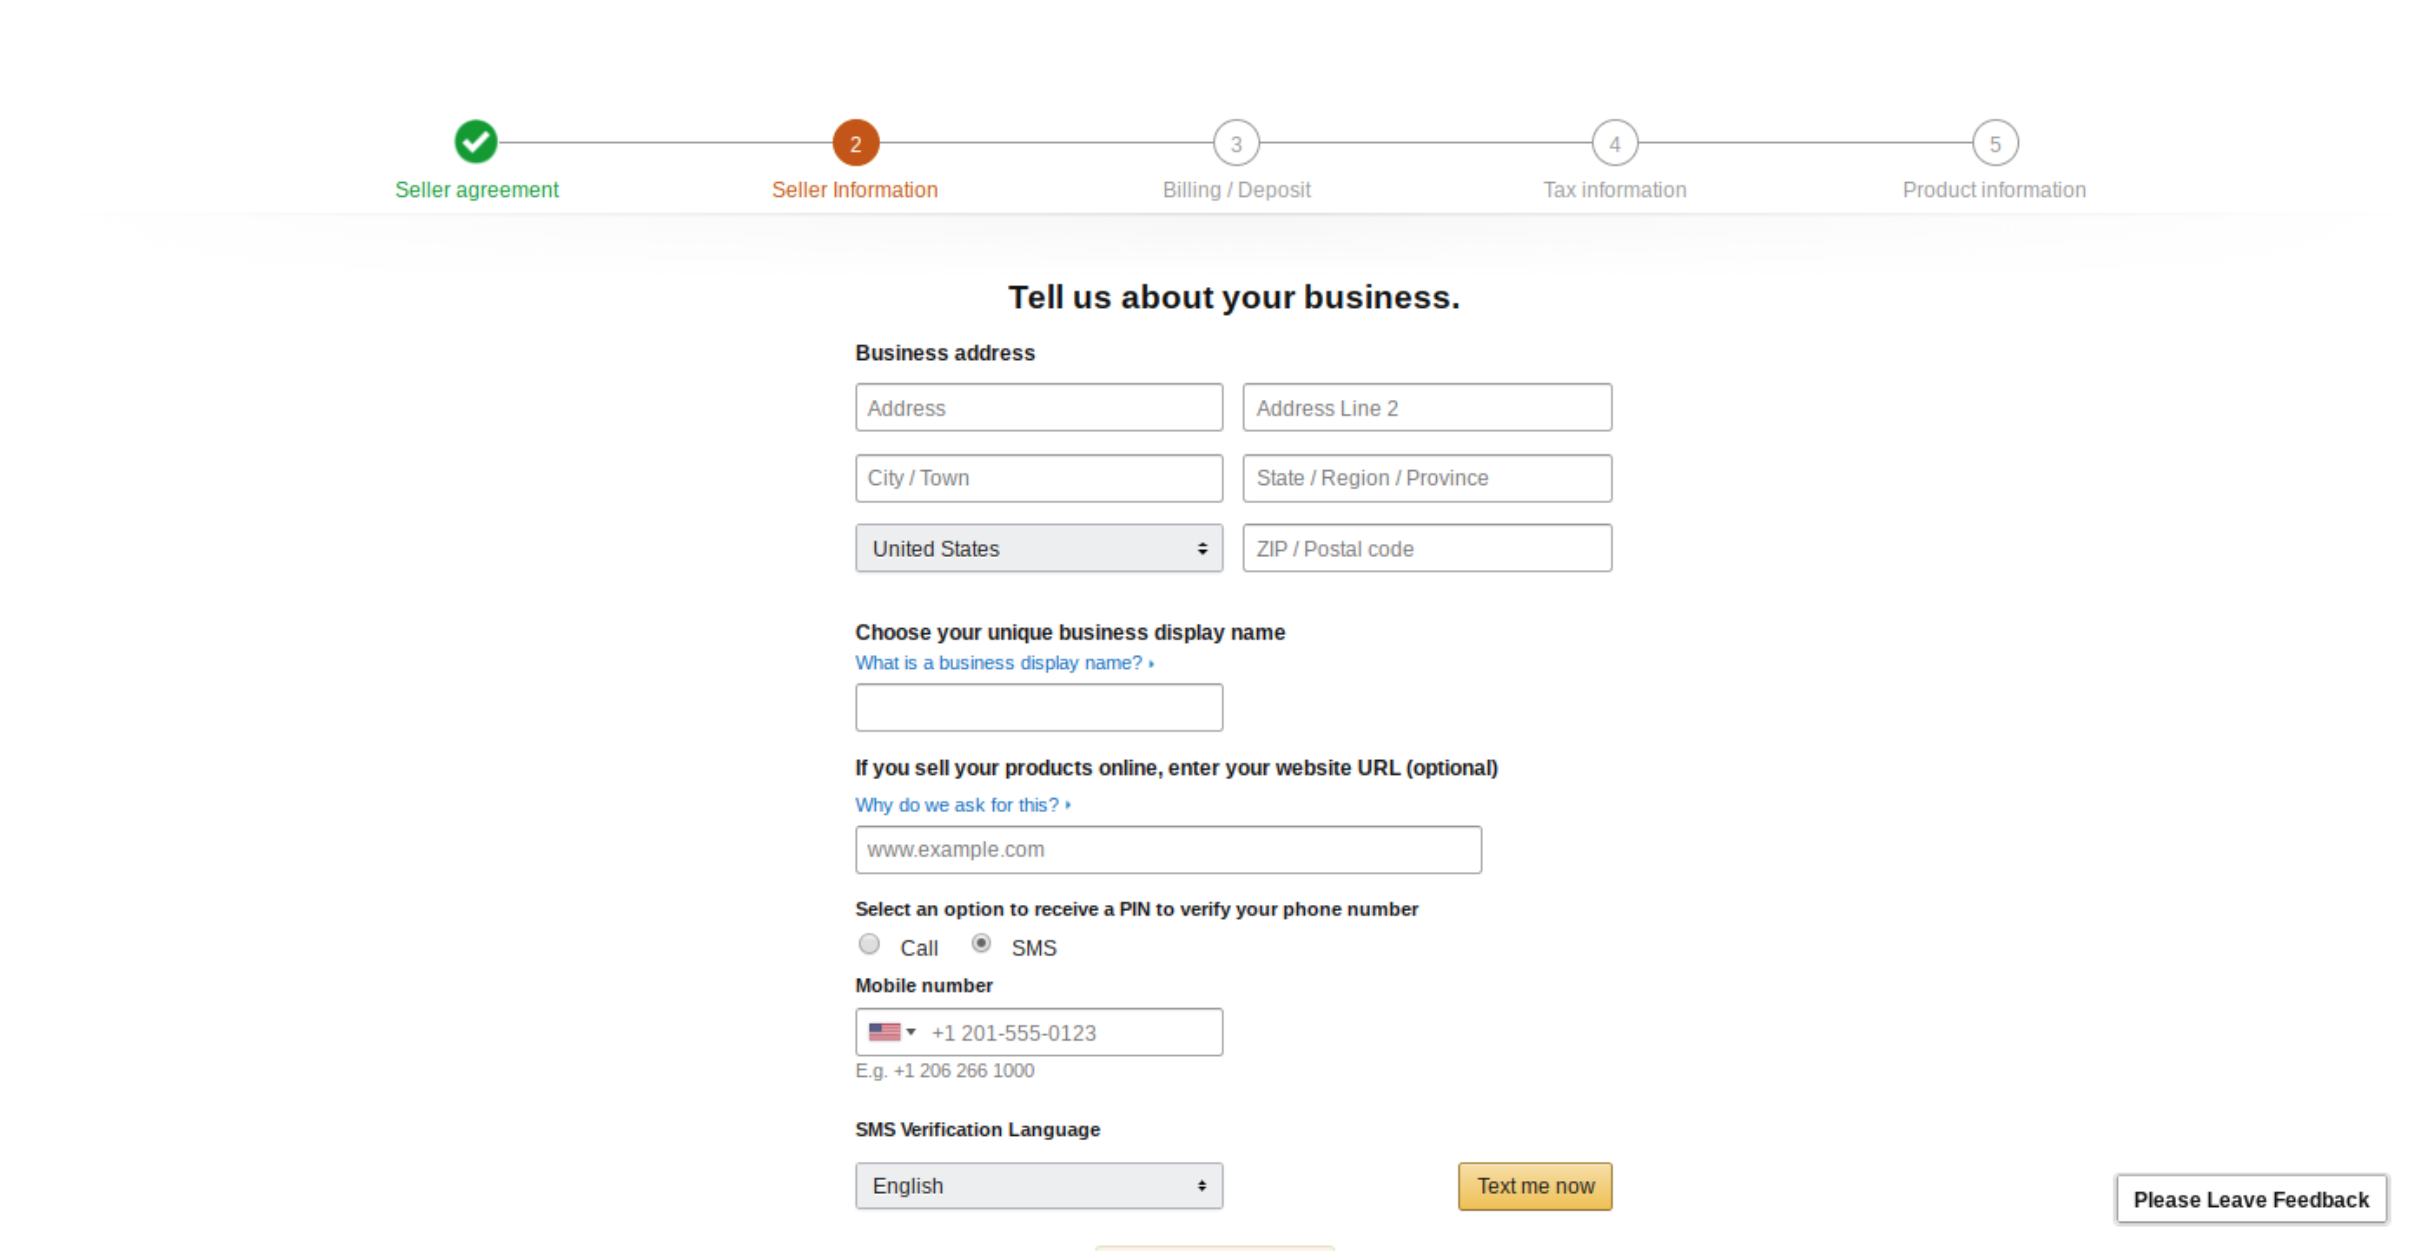
Step 2: Seller Information
Fill your basic business information and validate your phone number.
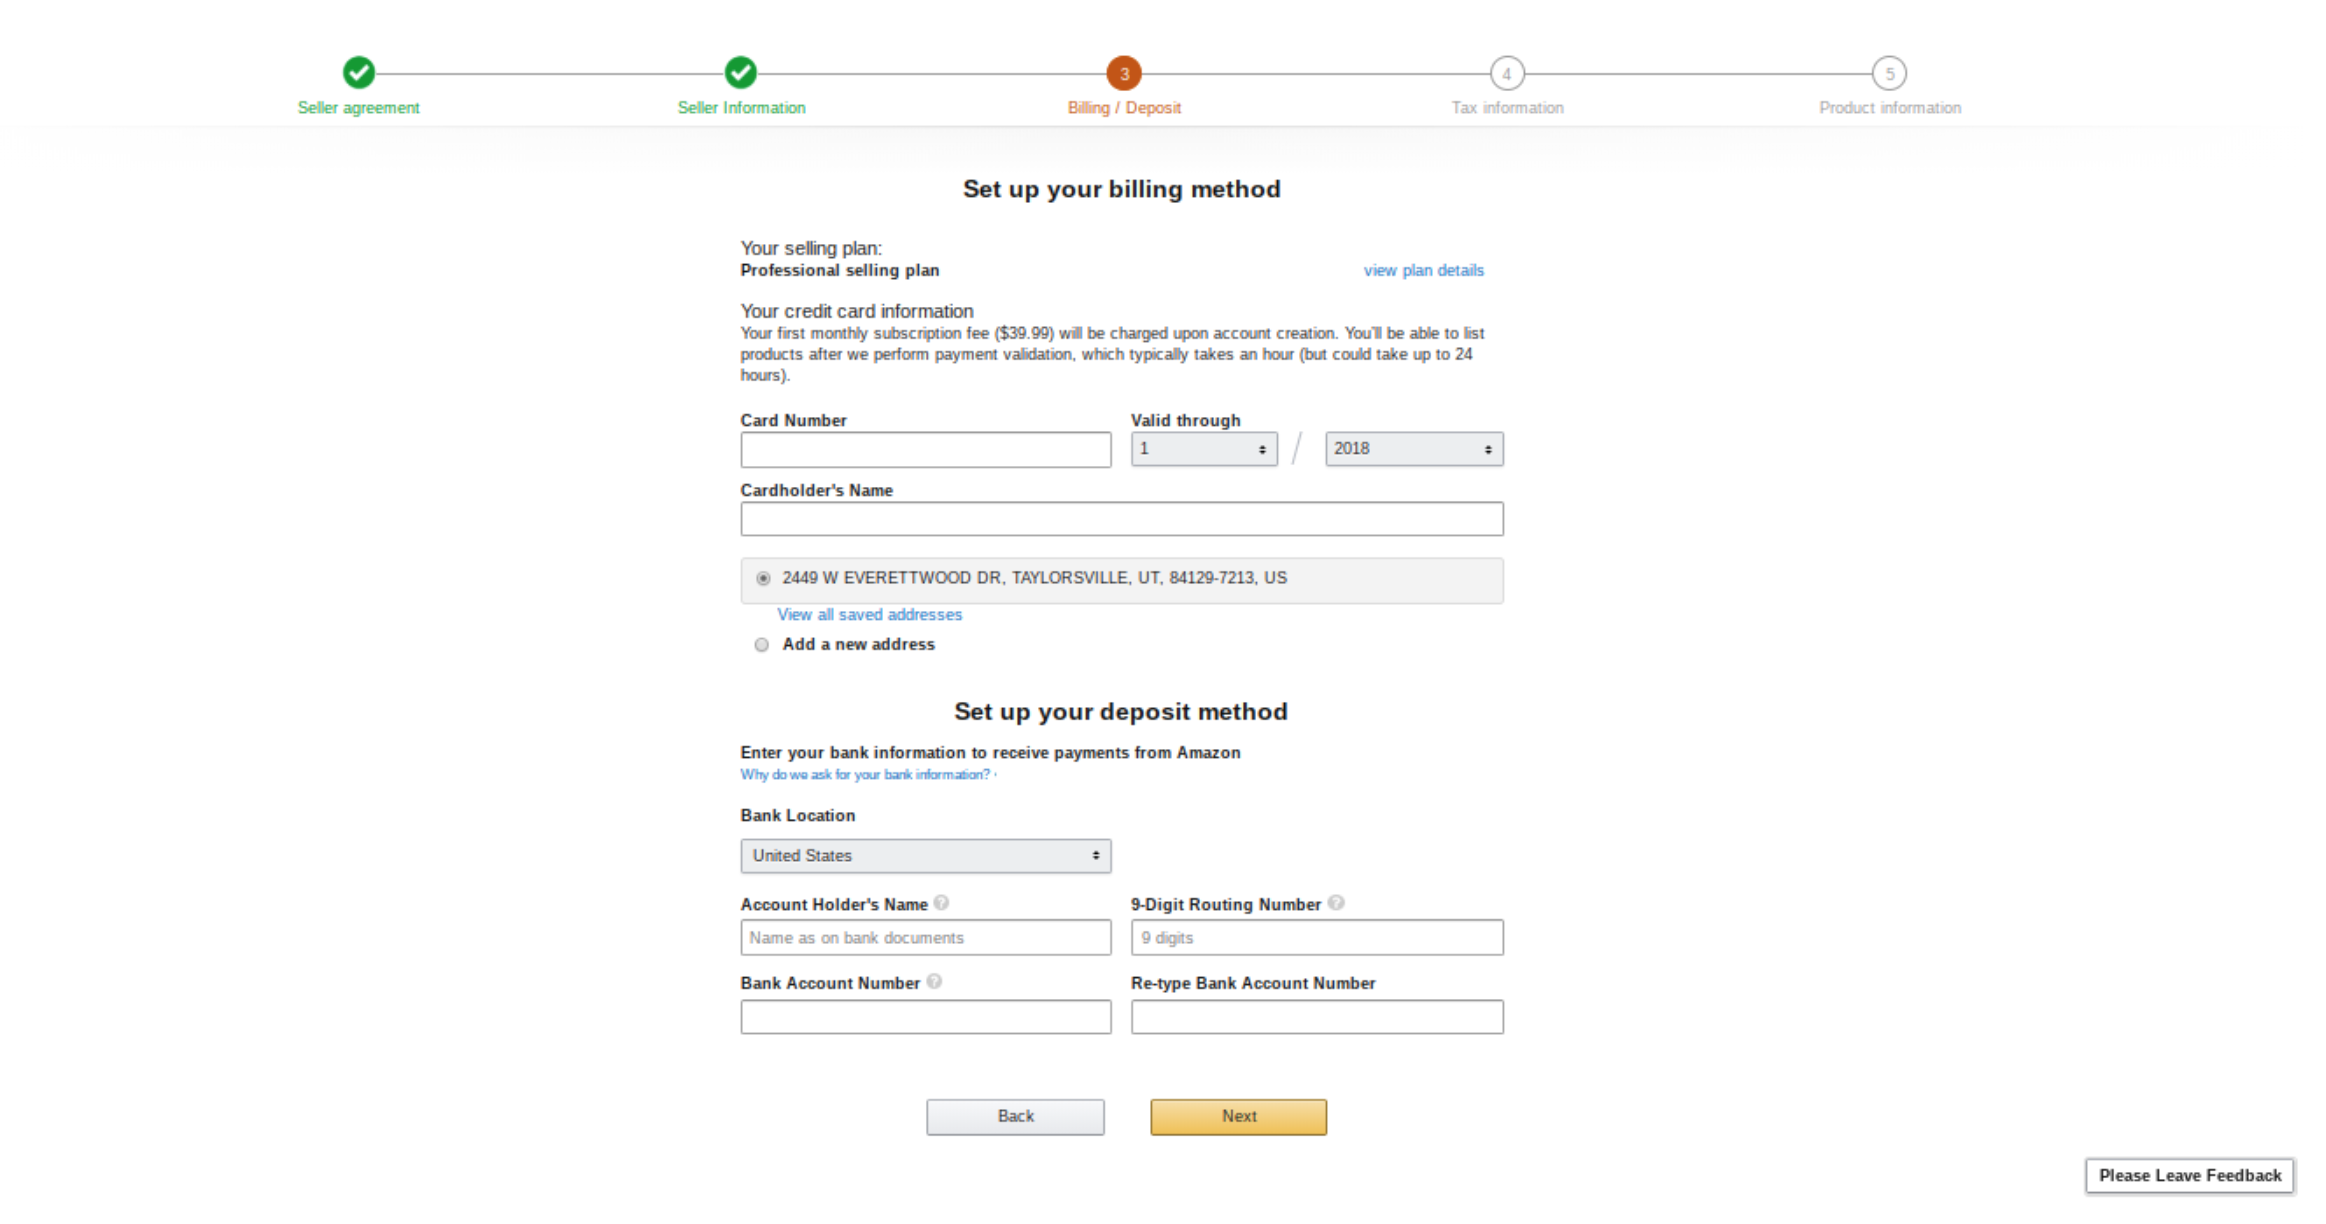
Step 3: Billing Information
Plug in your credit card and bank account info.
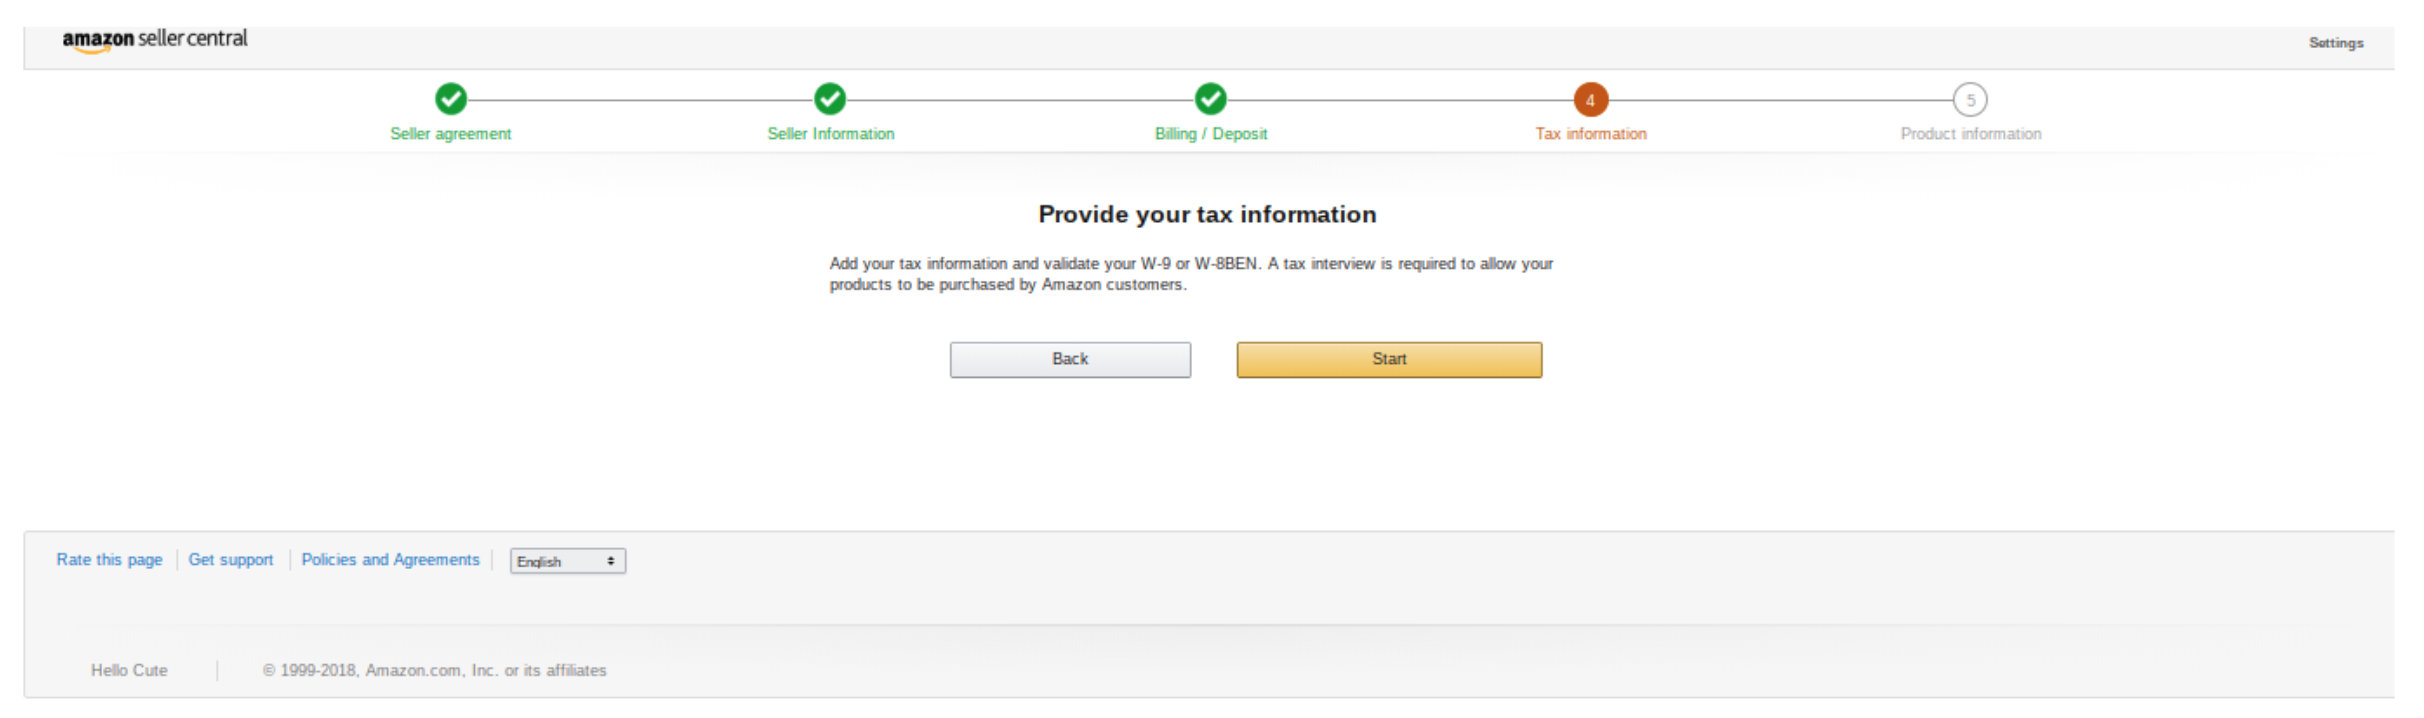
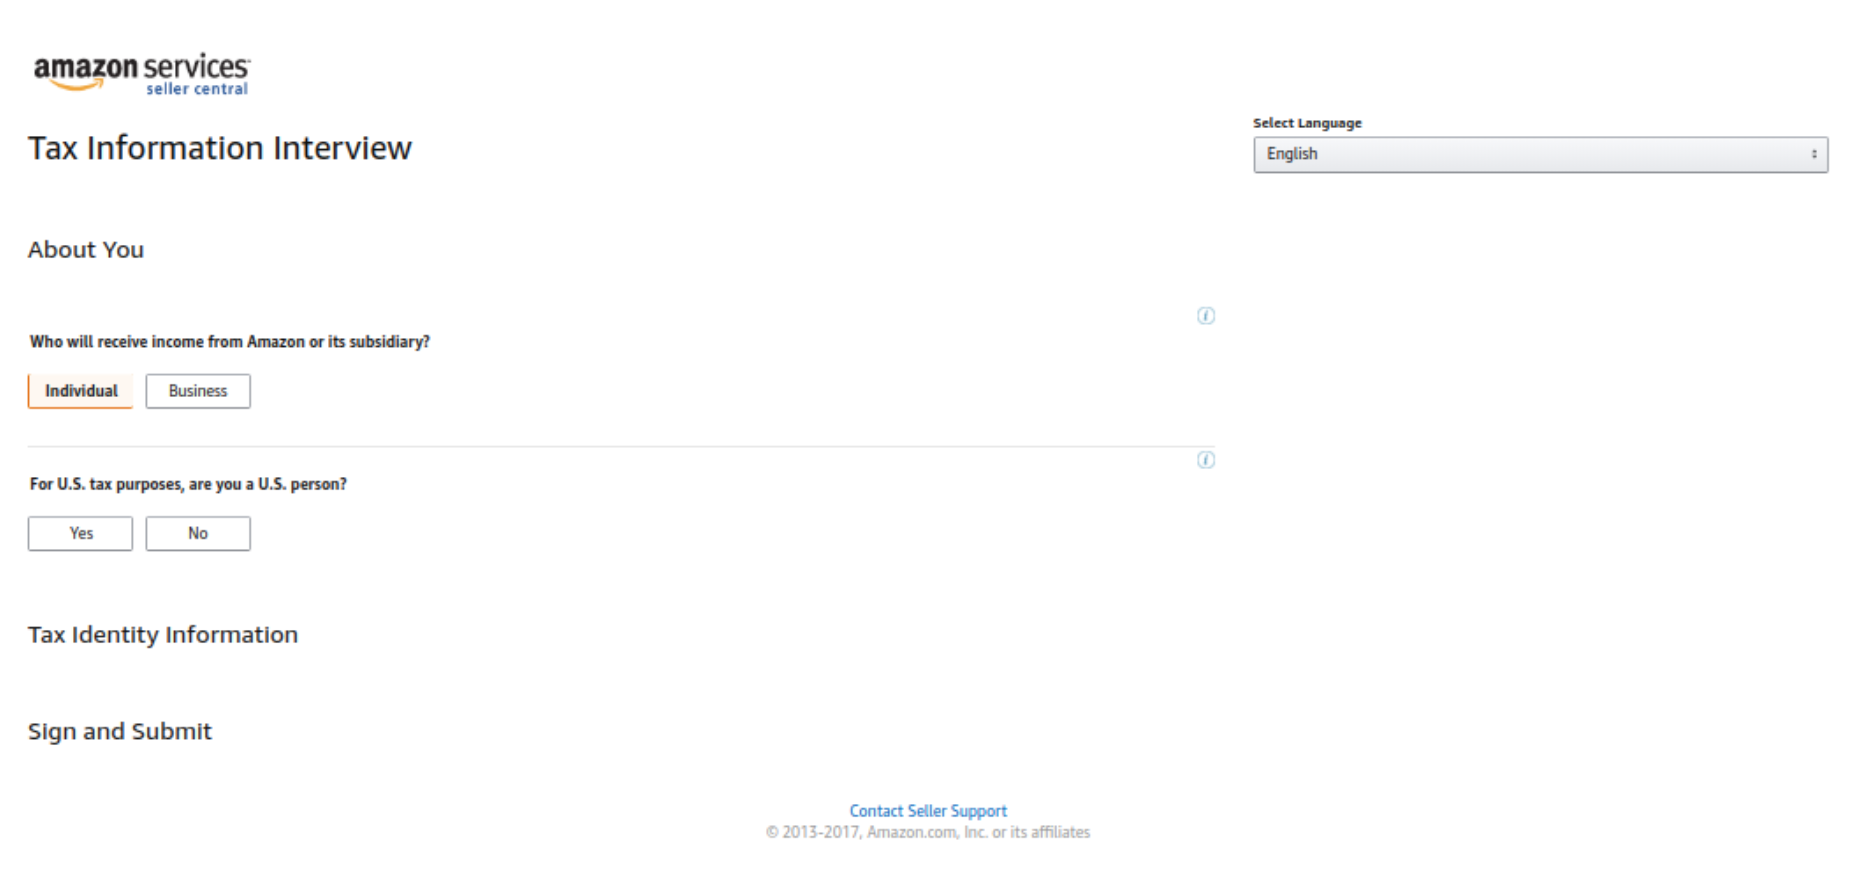
Step 4: Tax Information
Provide your tax information. You can register as an individual seller or as a business tax entity (LLC or corporation). Ask your accountant if you have questions about filling this out.
Your account is created! Now, let’s tweak a few account settings.
Professional vs. Basic accounts
First, designate whether you want to be a basic or professional seller. If you plan to sell fewer than 40 items per month, opt for an individual account. It costs you $0.99 per sale, plus a few other small Amazon selling fees.
Most sellers, like me, pay for a professional account. If you want to sell more than 40 items per month this is the account for you. It costs $39.99 per month, plus individual transaction fees.
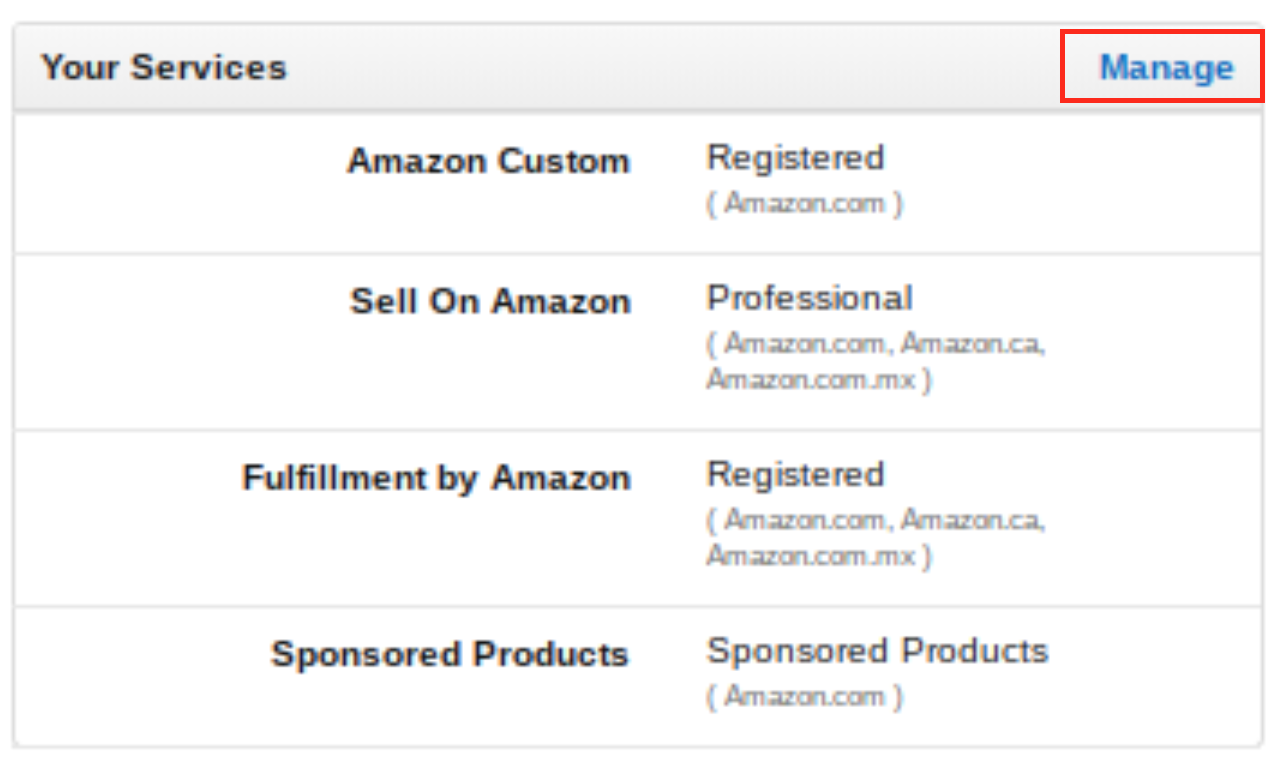
To change your seller account type, click "Settings" in the upper right hand corner of your Seller Central Home Screen. Under “Your Services” click “Manage”. This will tell you what kind of account you currently have, and allow you to upgrade/downgrade.
Step 1: Settings

Step 2: Manage Services
Step 3: Success

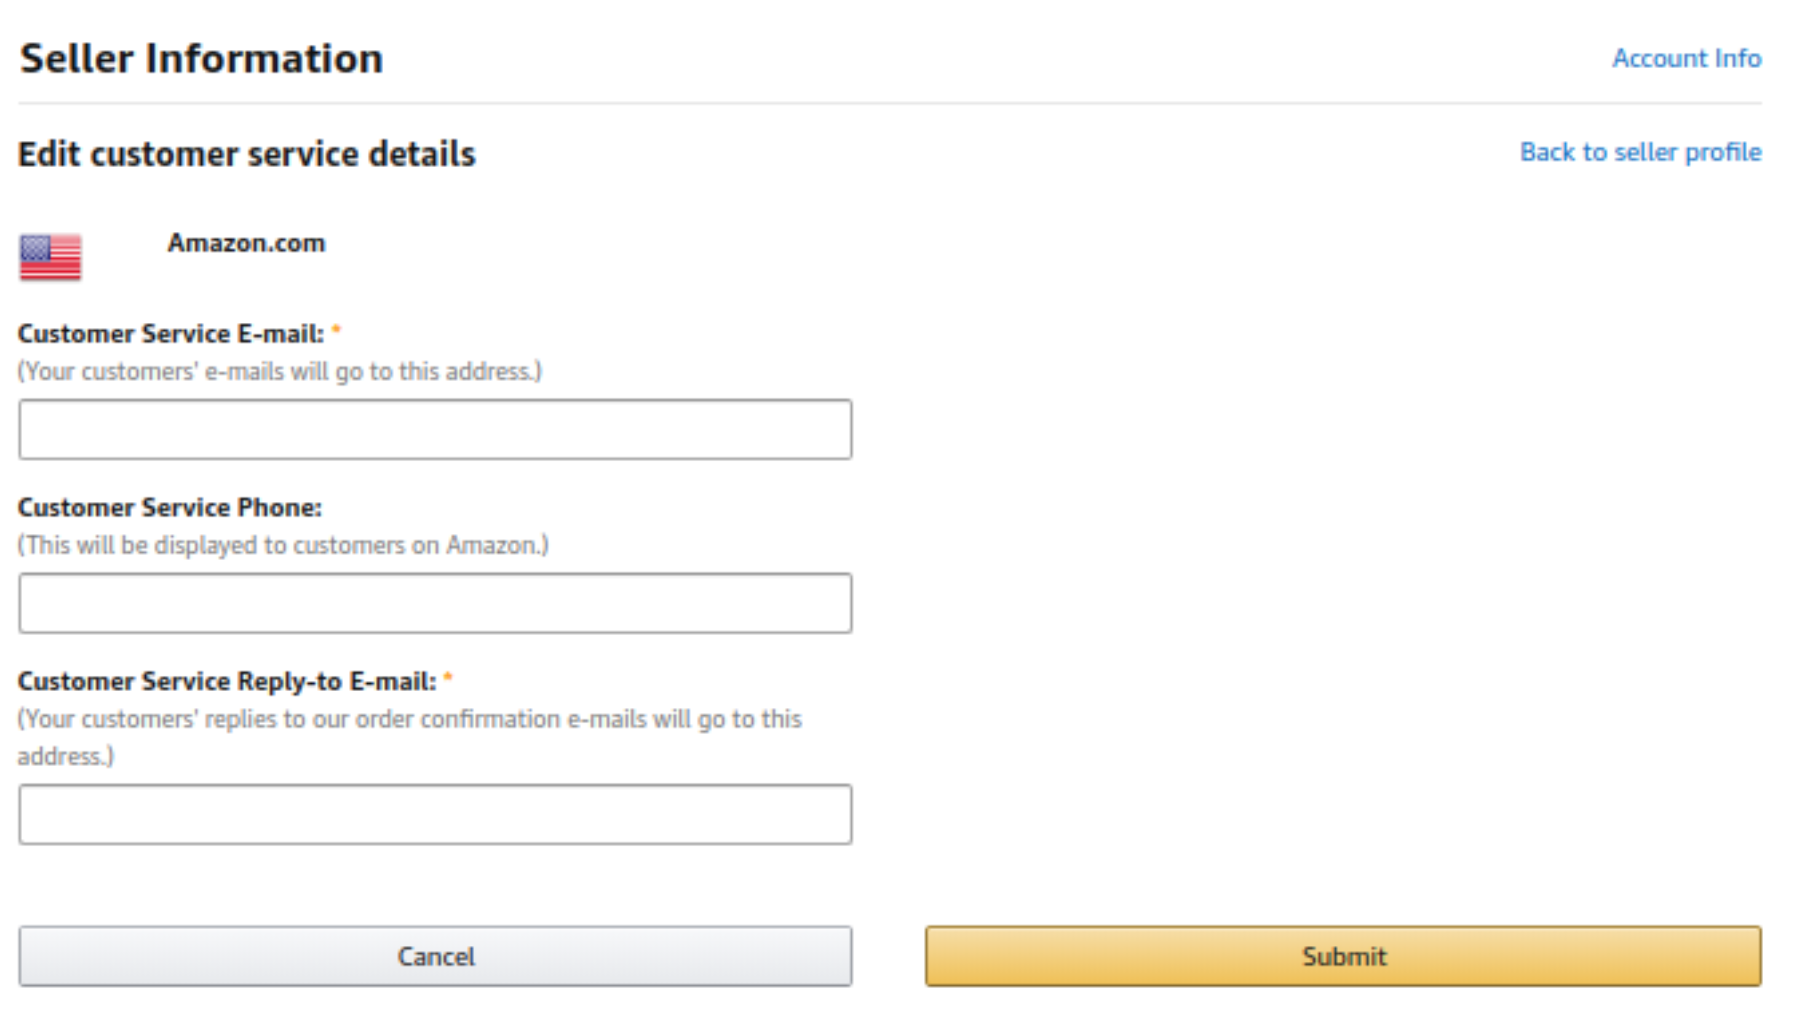
Contact Information
It’s important for your customers to be able to contact you about order problems, feedback or defective items. Changing your store name, contact information, storefront link, etc. can be done through settings > business information > display name.
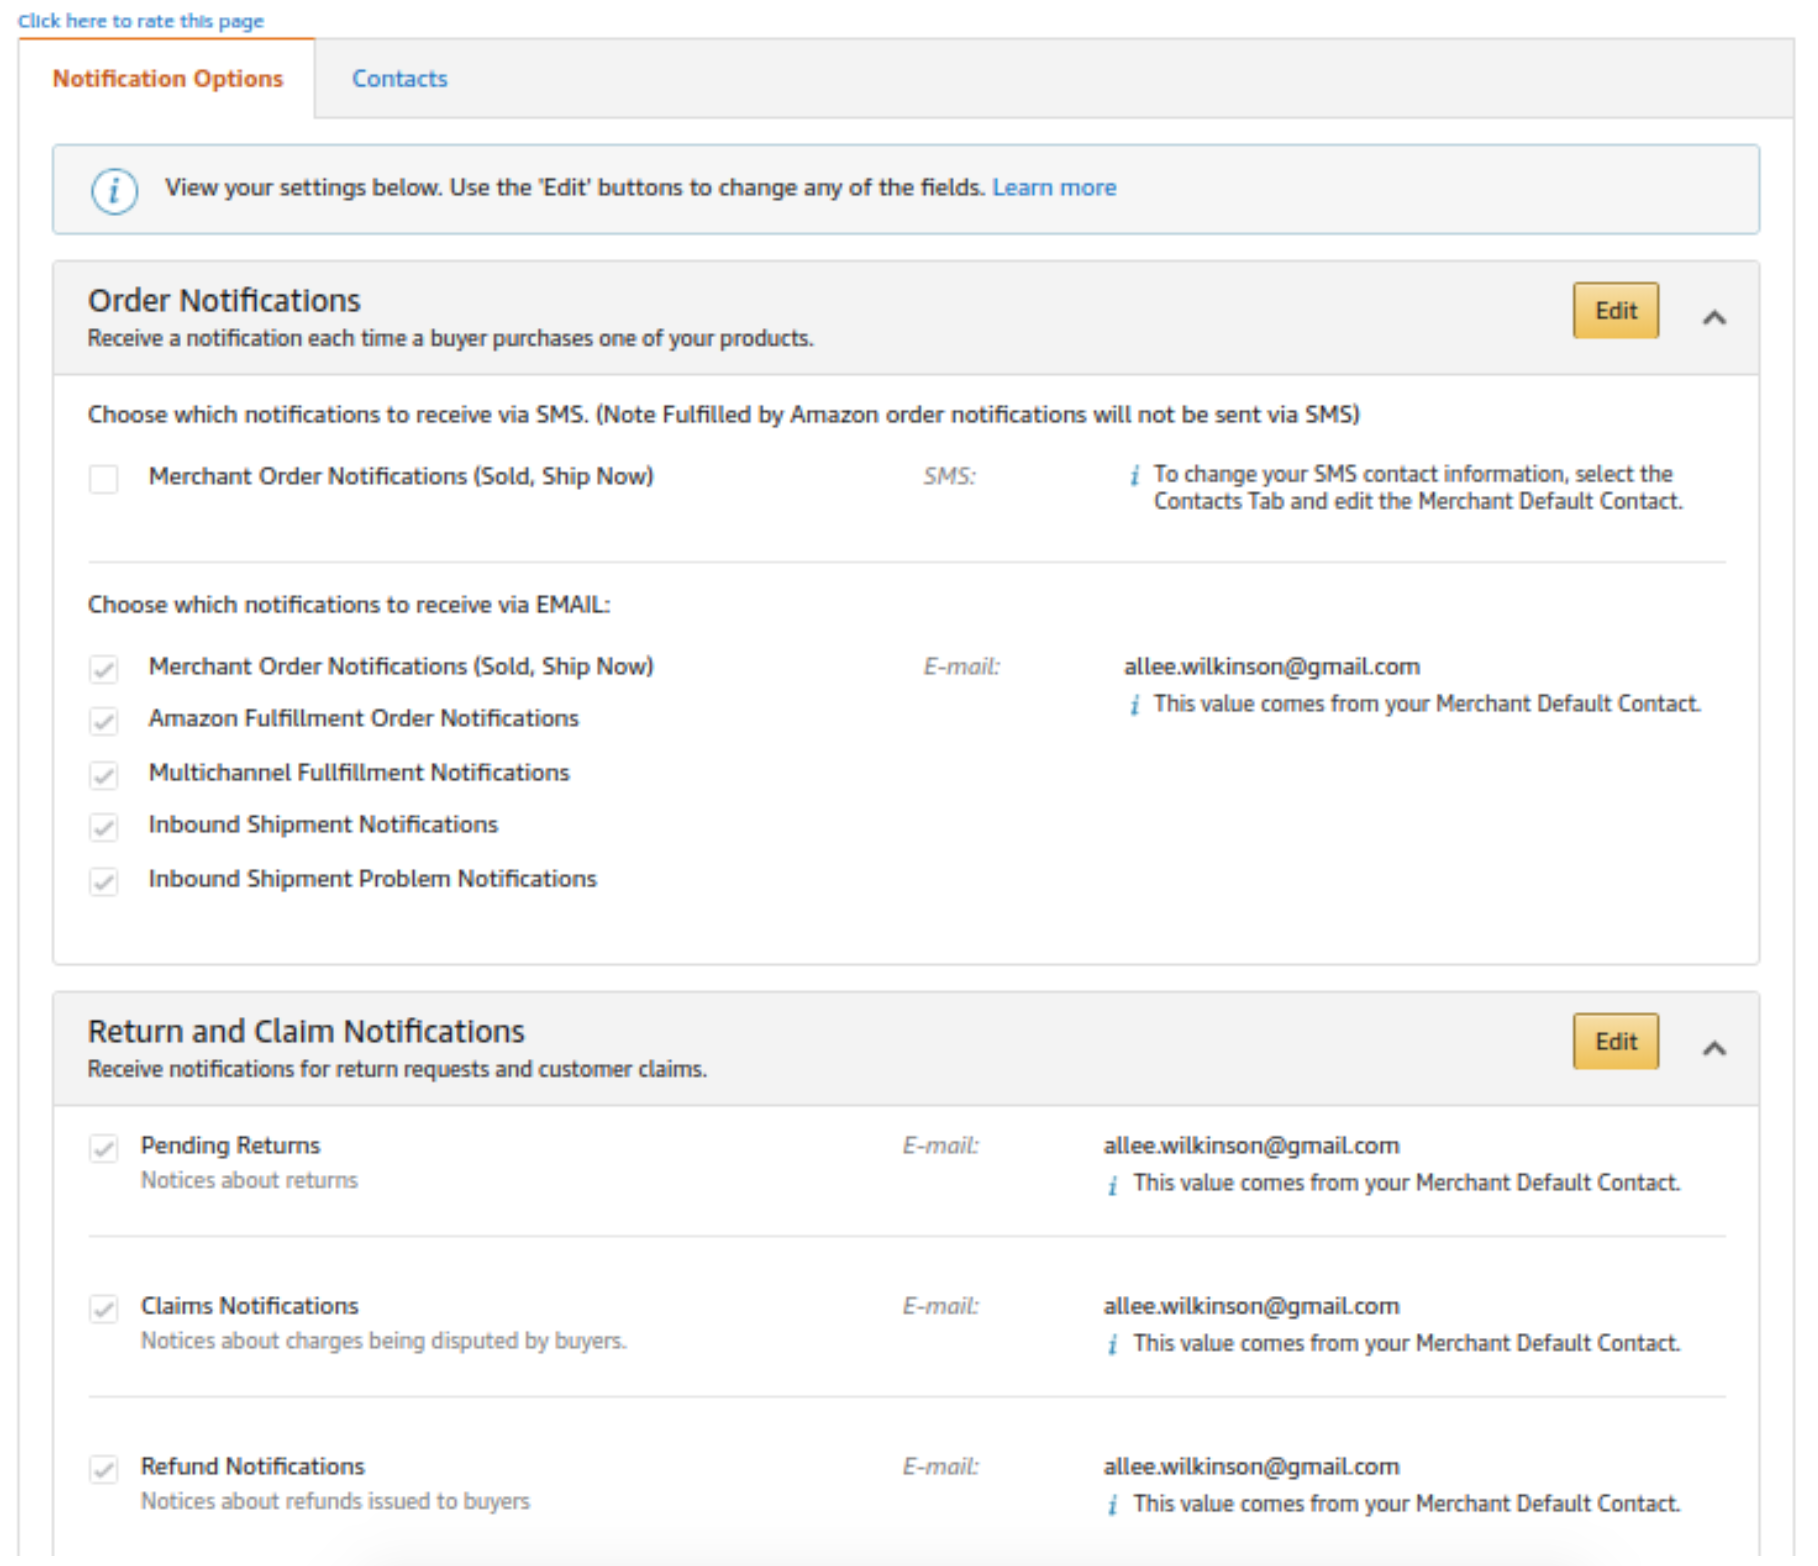
Setup Notifications
You can also designate how Amazon can contact you about order notifications, Guarantee Claim notifications, and technical updates. This can be done under settings>notification preferences.
Your account is complete and you’re ready to start selling! You just need some products. Check out my next guide to learn how I found reliable suppliers and begin the process of actually making a profit.